System Requirements
Clockspring can run on something as simple as a laptop, but it can also be clustered across many enterprise-class servers. Therefore, the amount of hardware and memory needed will depend on the size and nature of the dataflow involved. The data is stored on disk while Clockspring is processing so Clockspring needs to have sufficient disk space allocated for its various repositories, particularly the content repository, flowfile repository, and provenance repository. Clockspring has the following minimum system requirements:
-
2 CPUs (4-8 CPUs Recommended)
-
4GB RAM (8GB+ Recommended)
-
Supported Operating Systems:
-
Linux
-
-
Supported Web Browsers:
-
Microsoft Edge: Current & (Current - 1)
-
Mozilla FireFox: Current & (Current - 1)
-
Google Chrome: Current & (Current - 1)
-
Safari: Current & (Current - 1)
-
Install Clockspring
Download Clockspring
Version 2.3 of Clockspring can be found at this URL: https://www.clockspring.net/packages/clockspring-2-3.0.x86_64.rpm
To download directly to your server, use the wget command:
wget https://www.clockspring.net/packages/clockspring-2-3.0.x86_64.rpm
Install Clockspring
Install Clockspring with the yum package manager. Note: openjdk is required and will be automatically installed with yum
sudo yum install clockspring-*.rpm
Copy your clockspring.license that was delivered via email into /opt/clockspring/conf
sudo cp clockspring.license /opt/clockspring/conf
Change permissions on the license to the Clockspring user
sudo chown -R clockspring:clockspring /opt/clockspring/conf/clockspring.license
Install Service
Change directories to /opt/clockspring/bin
cd /opt/clockspring/bin
Execute the following command to install Clockspring as a service
sudo ./clockspring.sh install
Configure Firewall
The below commands will update firewalld to allow access to ports 8080 (http) and 8443 (https). Adjust as necessary for your environment.
Execute the following commands to enable access to ports 8080 and 8443 only available to your specific IP range.
NOTE: This will enable the firewall on the system and will block other traffic. ENSURE YOU UNDERSTAND WHAT IS BEING CONFIGURED BEFORE RUNNING THESE COMMANDS OR YOU CAN LOSE ACCESS TO YOUR SYSTEM FROM THE NETWORK
sudo firewall-cmd --zone=internal --permanent --add-port=8080/tcp
sudo firewall-cmd --zone=internal --permanent --add-port=8443/tcp
sudo firewall-cmd --zone=internal --add-forward-port=port=443:proto=tcp:toport=8443 --permanent
sudo firewall-cmd --zone=internal --add-forward-port=port=80:proto=tcp:toport=8080 --permanent
sudo firewall-cmd --zone=internal --add-source=<your IP range>/24 --permanent
sudo firewall-cmd --complete-reload
Validate Clockspring Services
Start the Clockspring service
sudo service clockspring start
We recommend you watch the /opt/clockspring/logs/application.log on initial startup to catpure the auto-generated credentials
tail -F /opt/clockspring/logs/application.log
When the server boots you will see a message indicating the system is up and the URL to browse to in order to log in. Your auto-generated login credentials are provided in this log in a format similar to:
Generated Username [90228b8d-e0f7-4998-9205-741ad888b514]
Generated Password [ZRDn0os5EPeG4b7W0sSG53qHnWvKGHkQ]
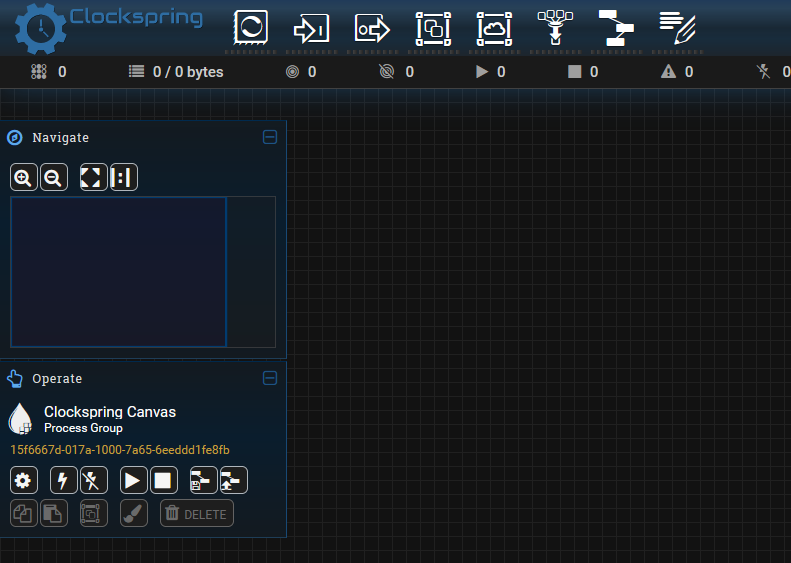
Open a browser window and navigate to https://<your_clockspring_ip>:8443/nifi which should display the Clockspring application as shown below.
Note: The service takes a few minutes to start. If the service is unreachable after 5 minutes then please check the logs in /opt/clockspring/logs for any messages.
Add Clockspring Registry
Clockspring provides many purpose-built processors available to all customers. In order to access these processors, the Clockspring Registry must be added to your Clockspring instance.
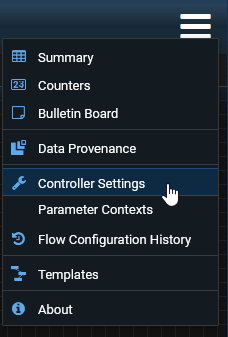
Within the Web UI, click on the menu button on the top right corner of the screen. From the menu select “Controller Settings”
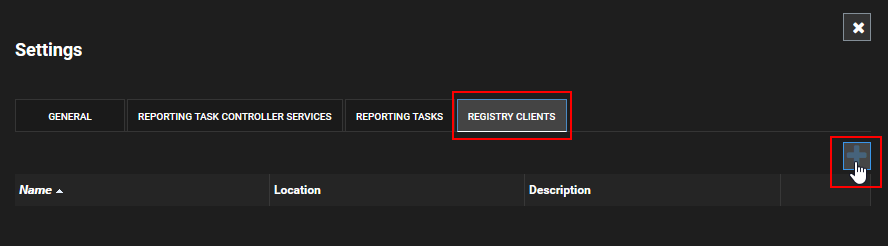
A new window will pop up to configure the controller settings. Select the “Registry Clients” tab then click the “+” button to add a new client
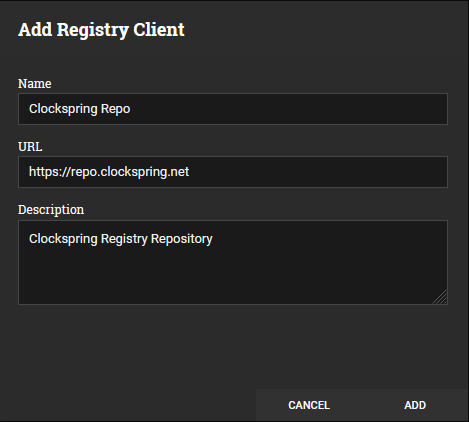
In the Add Registry Client window, enter a name and description for the registry with the URL defined as: https://repo.clockspring.net. Click Add when complete then close the settings window.
Clockspring is now ready for use